My Step-By-Step Guide on
How to Renew a US Tourist Visa Without Interview
(2022 update)
First, you have to find out if you are eligible for visa renewal without interview. The criteria are as follows:
Eligibility Criteria for Interview Waiver Applicants:
If you can answer “yes” to all the following questions, you may qualify for our Interview Waiver and will not need to schedule an appointment for an interview at the U.S. Embassy.
**Please note: if you answer YES to the below questions but are found to be ineligible for Interview Waiver service, your application will be returned to you via courier, and you will be required to schedule a visa interview. Please read all eligibility criteria carefully. If applying as a family, all family members must meet eligibility criteria.
Eligibility Criteria for Interview Waiver Applicants:
- I have a previous B1/B2 visa that I wish to renew;
- My prior visa was valid for ten (10) years;
- My prior visa is still valid or has expired within the last 48 months;
- I have in my possession my passport with my previous visa from the same visa category for which I now wish to apply;
- My name, date of birth, and gender on my last visa are the same (If there is name change due to marriage or annulment, I can provide documentary proof); **
- My most recent visa was issued on or after my 14th birthday; ***
- The last time I applied for a visa it was approved;
- I have not requested an extension or change of status through USCIS.
**Submit an original copy of Marriage Certificate or Declaration of Nullity of Marriage issued by Philippine Statistics Authority (PSA), whichever is applicable.
***For applicants under the age of 14 and over 79 years of age should check here.
HOW TO APPLY
STEP 1. Have your photo taken.
Have your photo taken at Great Image. We use Great Image everytime we apply for a visa, whether it's for a US visa, Japan visa, or Korea visa. They have been very reliable. Just tell them that the photo is for US visa purposes so they know what to do. Make sure to request GLOSSY. The interview waiver confirmation letter checklist specifies that the photo should be glossy. The package costs 269 pesos.
There is no dress code mentioned but wear decent clothes. To be safe, we wore clothes that has a collar and sleeves.
To summarize, you need to request the ff. from Great Image:
(1) 2 pcs 2 x 2 US visa photo in GLOSSY photo paper - You need 2 pcs to submit to the US Embassy together with your passports and interview waiver confirmation letter.
(2) soft copy - to be downloaded in your phone. You need a soft copy you can upload to your DS-160 application forms.
My tip: Do this first because you cannot submit your DS-160 without uploading your photo.
STEP 2. Pay the visa fee.
The tourist visa is US$160. You pay it in the local currency of the location where you are applying. If you're applying in the Philippines, you pay its peso equivalent as determined HERE. Take note of the peso amount and until when it is valid. You must pay the correct amount within the date stated as the deadline. When exchange rate is volatile, the peso equivalent changes every week.
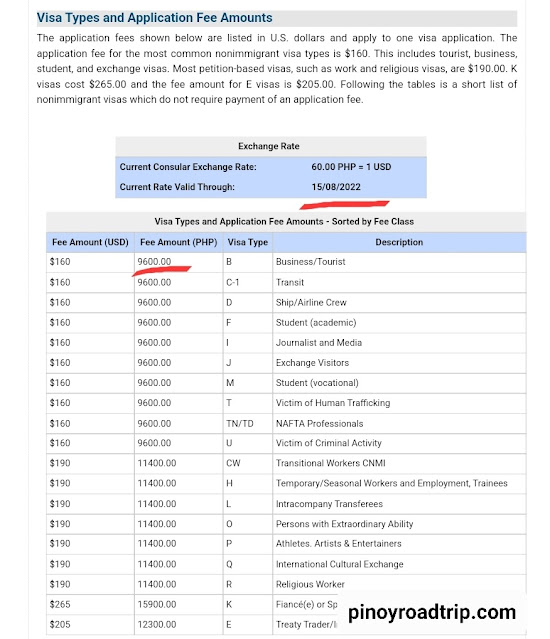 |
| This means that you should pay 9600 pesos by August 15. |
You can pay in 2 ways:
1. Over-the counter at RCBC.
Go to this site: Bank and Payment Information. Click the Deposit Slip - $160 MRV Fee link to retrieve your US visa deposit slip with the RECEIPT NUMBER. Then go to any RCBC branch to pay the visa fee.
Below is a sample US Visa fee deposit slip with instructions. Note that you have 5 days from the time you generate the deposit slip to make the payment. The deposit slip expires. Therefore you must take note of the expiration date indicated in the upper right hand corner of the deposit slip. To generate the deposit slip, you need to click Deposit Slip - $160 MRV Fee link then print and bring to the bank.
After you have paid the visa application fee, keep the bank receipt for your records. It cannot be replaced if it is lost. You will not be able to schedule an appointment without listing down your receipt number when you submit your application online.
2. Online
If you have an online account, you can make an online payment via Pesonet.
Go to this site: Bank and Payment Information. The peso equivalent as determined HERE. Take note of the peso amount and until when the current exchange rate is valid. You must pay online the correct pesos amount within the date stated as the deadline. When exchange rate is volatile, the peso equivalent changes every week.
Log in to your online account online and make payment as indicated above.
STEP 3. Fill up the Online Nonimmigrant Visa Application (DS-160).
You can find the form HERE .
MY TIPS :
1. Make sure to remember your APPLICATION ID at the start of your application so you can retrieve and continue filling up your application in case you don't finish it in one sitting.
2. Prepare the digital copy of your photo. Uploading the digital photo is the last stage of the the process before submitting the DS-160 form online. You cannot submit and digitally sign your application forms without the photo.
Important things to take not of when filling out the DS-160, which may have a persuasive effect on your visa application.
1. Your current status, whether employed, or self-employed, studying, or retired. This will determine whether you have enough ties that bind you to the Philippines.
2. Your last 5 visits to the United States. You must visit the US at least once during the validity of your previous 10 year visa. Otherwise, the consul will think twice about issuing you a new one if you didn't even use the old visa.
3. Countries you visited in the last 5 years. It's a plus if you visited other countries in the last 5 years. It shows you're a legitimate tourist and always returns to the Philippines after visiting other countries.
4. The identifier of your social media accounts, like Facebook, Instagram, Twitter, LinkedIn, YouTube etc., you used for the past 5 years. They will be looking into what you have publicly posted in the past 5 years, and whether you have views that may pose danger to the US.
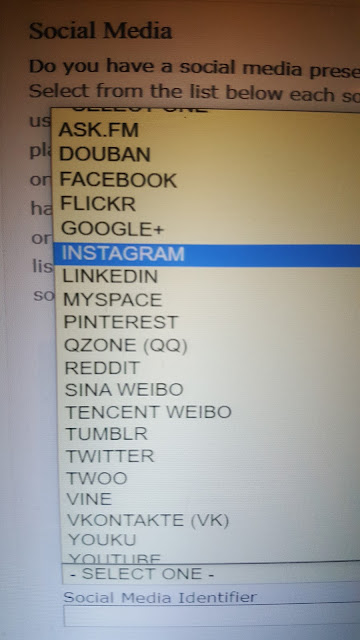 |
| These are the social media platforms mentioned in the DS-160 |
5. The email addresses and mobile numbers you used in the past 5 years.
STEP 4. Create an Account to be able to retrieve the Interview Waiver Letter
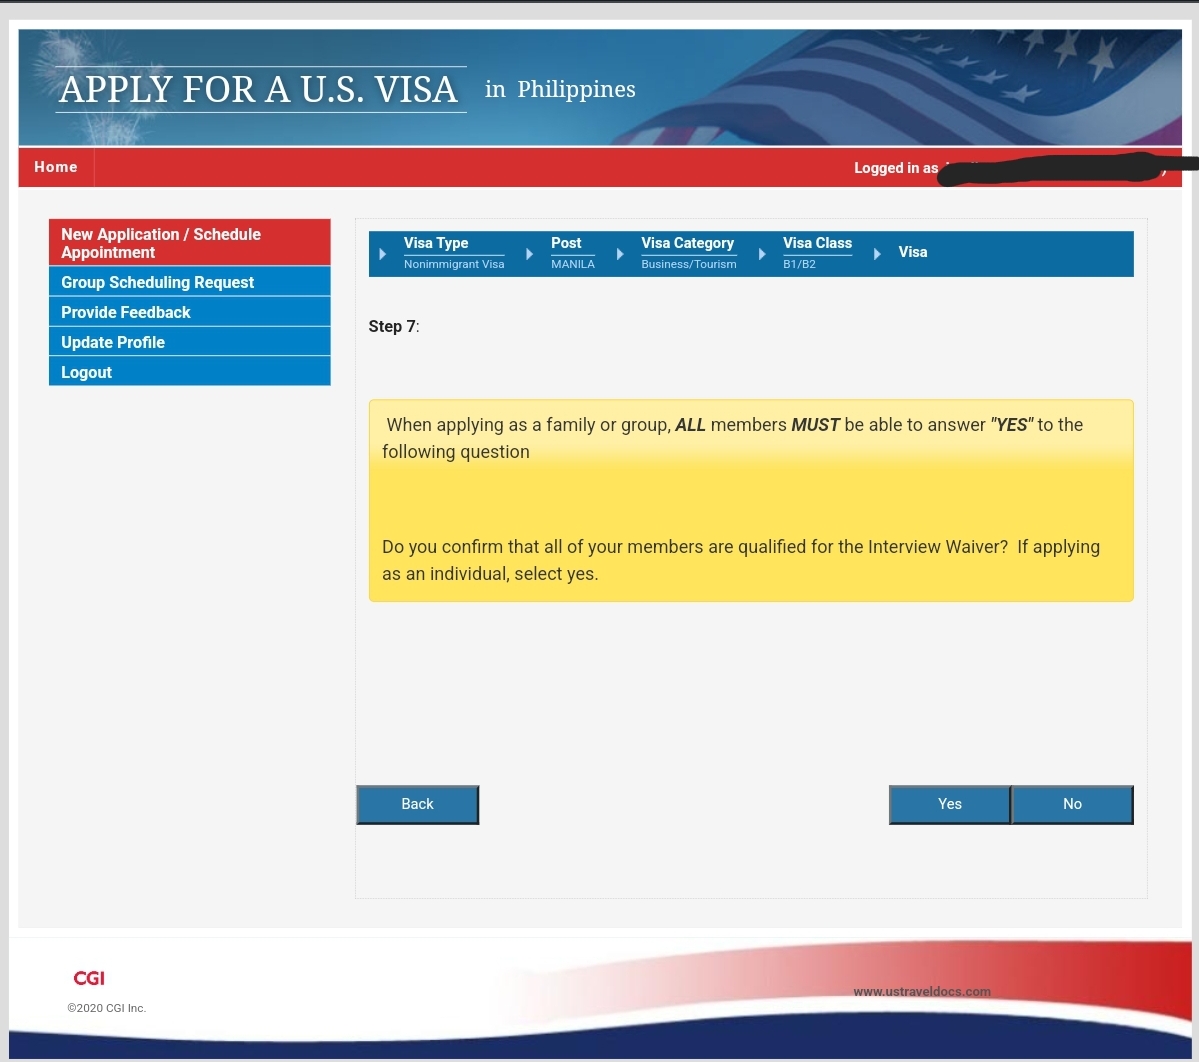
Once you have created your account, log in then click New Application/Schedule Appointment on the upper left hand corner and continue answering the questions as shown in ff screenshots below.
The screenshot below is where you input your DS-160 confirmation number.
The following questions in the screenshot below determines whether you are eligible for interview waiver.
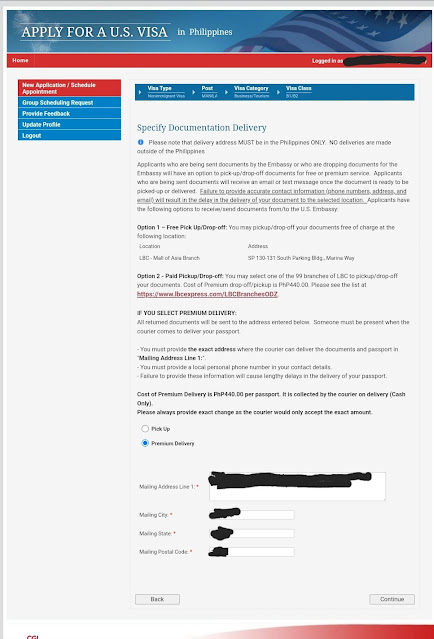 |
Indicate here whether you want to have your visa documents delivered to you.
|
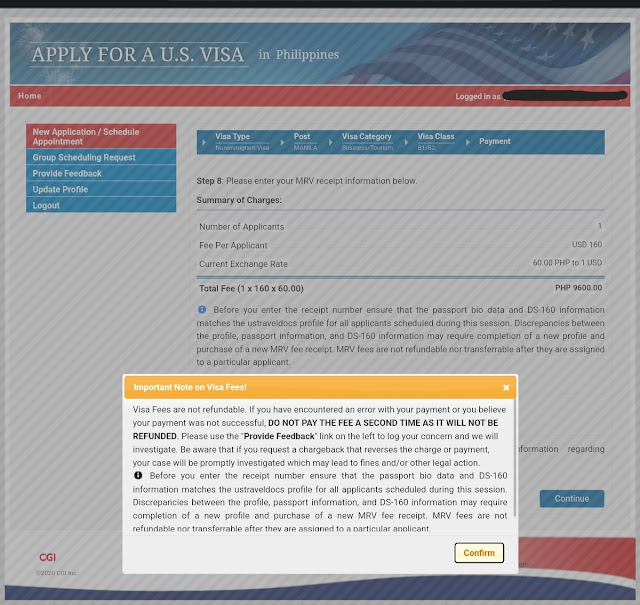 |
The amount indicated here may be different from the amount you paid. Don't worry. As long as you paid the correct conversion rate on the day that said conversion date is valid, your payment will be accepted.
|
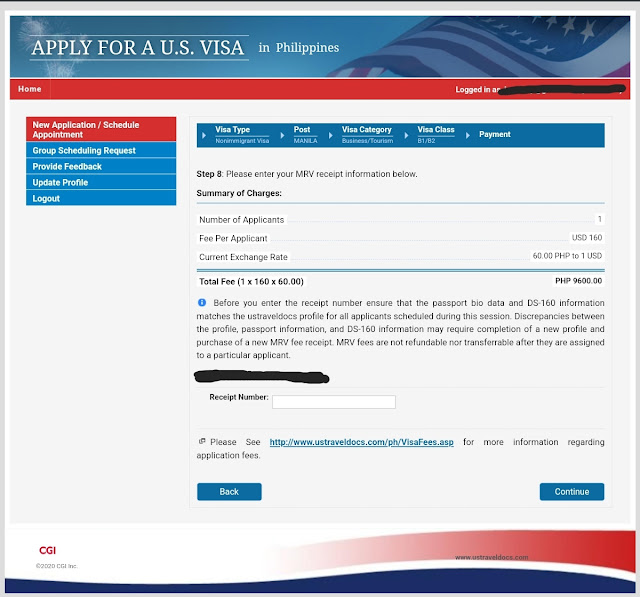 |
| This is where you input your receipt number |
 |
| This is the interview waiver confirmation letter |
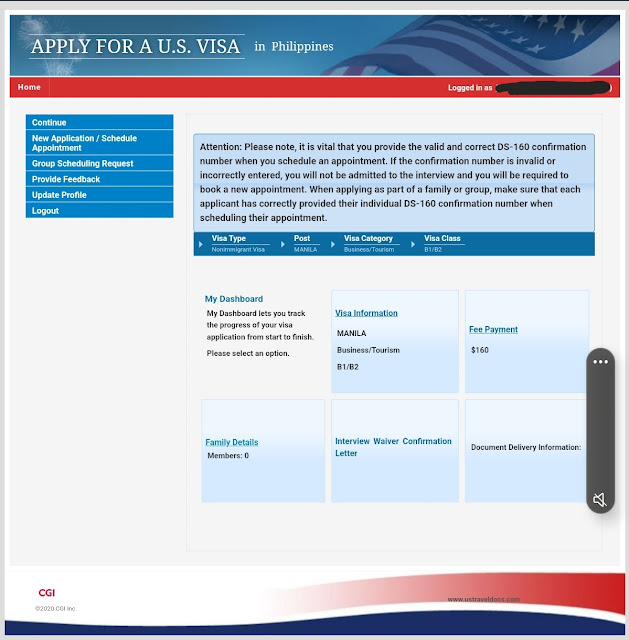 |
| This is what your dashboard looks like after submitting everything. |
STEP 5. Gather all documents to be sent to the US embassy via LBC.
CHECKLIST OF THE ITEMS YOU NEED TO SUBMIT:
1. Interview waiver confirmation letter Valid passport
2. DS-160 Confirmation Page
3. Two 2x 2 photographs taken within the last six months printed on glossy paper
4. Valid passport
5. Old passport with previous B1/B2 visa
STEP 6. Bring the documents to LBC.
Note that not all LBC outlets receive these US Visa documents. Only specific ones listed below can receive the US visa documents.
If you wish to drop off your visa documents for free, go to the LBC Mall of Asia branch.
If you wish to drop off your visa documents at an accredited LBC outlet near you, other than the LBC Mall of Asia branch, you pay 440 pesos upon submission of the documents
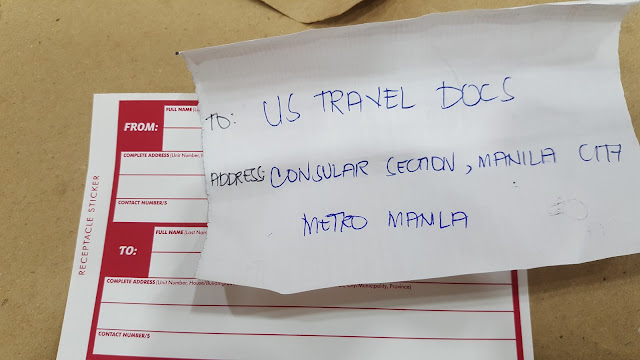 |
| This is what you should put on the label. |
The documents will be delivered to the US Embassy the day after dropping it off at an accredited LBC branch.
The following status will appear on your dashboard after bringing your documents to the LBC:
When you see the status shown below it means it's out for delivery. Make sure to leave an authorization letter if you're not available to receive it and the 440 pesos to be paid to the courier. LBC does not text the recipient on the day the passports are to be delivered
STEP 7. ARRIVAL OF THE PASSPORTS WITH THE US VISA
From our experience, the longest time from document drop off at LBC to delivery to our residence is 8 calendar days. The shortest time is 5 calendar days.
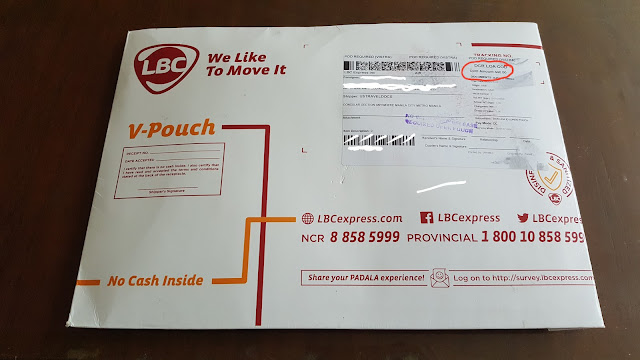 |
| The item encircled in red is the cash amount to be paid upon delivery. |
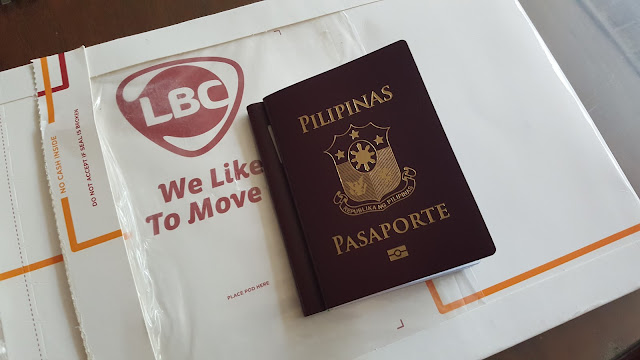 |
| 2 passports are returned to the applicant: the valid passport with the new 10-year B1/B2 visa and the old passport with the previous B1/B2 visa. |


